How to upload real files in Laravel Tests
This is a brief guide on how to upload real files - not fakes - when testing with PHPUnit in Laravel.
Introduction
When building an application in Laravel, it is often the case that files would have to be uploaded.
Running an endpoint in Postman or designing a view in order to test that the file is being processed properly can be a cumbersome task. This guide will teach you how to upload real files in Laravel tests, instead of using fakes, so that we can actually read the content of the file and be sure that it's processing properly.
Using a fake file in your test is convenient when you only need to assert that a file has been uploaded and/or saved. However, it is impractical when the content of the given file matters to you.
In this guide, we will upload an Excel spreadsheet so that we can use and test the rows and columns contained therein.
Prerequisites
These are important prerequisite knowledge needed for this tutorial:
Familiarity with Laravel 5.5+
Laravel testing with PHPUnit. The latest versions of PHPUnit, such as version 9 or 10, should be sufficient.
Overview
In this article, we'll work on a feature that extracts data from a row in a spreadsheet and persists it in the database.
For the sake of this tutorial, we'll deal with spreadsheets in a common format such as XLSX or CSV. Also, we are going to use the Spartner Laravel Excel package (formerly Maatwebsite/Excel).
Then we'll write the tests and controllers needed. The application we'll be working on is one that takes financial data from a spreadsheet and processes it to create metrics.
Installation
To install the package, run composer require maatwebsite/excel in a terminal.
No further configuration is needed, but you can still explore the options available. Just run php artisan vendor:publish --provider="Maatwebsite\Excel\ExcelServiceProvider" --tag=config to publish the configuration file, which contains a long list of options.
Creating spreadsheet
Next, we need to create a spreadsheet. You may use any software of your choice but I have already created a spreadsheet in Google Sheets with just a heading row and one single row of data.
Your spreadsheet could look like this:
Year | Month | Total issued shares | Dividends Paid | Weighted Average Cost of Capital | Capital expenditure (additions) | Depreciation | Accumulated depreciation | Historical cost of assets | Cash flow from operations |
2022 | 07 | 1000000 | 0 | 18% | 2 | 4 | 6 | 9 | 590 |
Testing
Where should we save the spreadsheet?
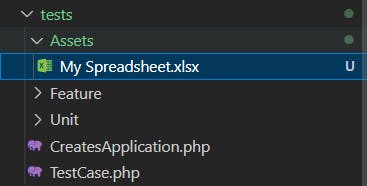
Let's begin by creating a folder in our Tests directory. It may be a good idea to save the spreadsheet in a folder called "Assets" within your "tests" directory.
My directory looks like this:

Basic structure of test class
Next, let's create the test class. You can create it in the tests/Feature namespace.
When it comes to creating test classes, I often like to do it without explicitly naming the classes. I've explained my reasons in a previous article. If you want to use that approach, though, just be aware that it'll affect the way you use the php artisan test --filter command. For example, you will no longer be able to selectively run only tests in that class by passing the name of the class to the filter argument. However, you will still be able to call individual classes one by one.
That being said, let's create an anonymous class like this:
<?php

namespace Tests\Feature;

use Tests\TestCase;
use Illuminate\Foundation\Testing\LazilyRefreshDatabase;

return new class extends TestCase
{
    use LazilyRefreshDatabase;

    public function test_that_excel_details_are_saved()
    {
        //
    }
};
We'll return to this class in a moment, but we need to examine the work so far.
First, we have set up the file as an anonymous PHP class by just returning a new class.
Our new class then extends the default TestCase class, which is responsible for bootstrapping the application, and setting up and tearing down tests.
Next, we have imported the LazilyRefreshDatabase trait. This trait cleans out your database in between tests only if the next test to be run actually makes use of the database. This is an improvement over the RefreshDatabase trait in older versions of Laravel. However, you are free to use the latter if you wish.
After using the trait, we have defined the test function and called it test_that_excel_is_processed. Prepending test to the function's name will cause PHPUnit to recognize it as a valid test and run it.
If we need to run this test, all we need to do is to pass its name to the filter flag:
php artisan test --filter test_that_excel_is_processed
Let us move on to add a bit more flesh to the class. You can skip this and move to the next example, but we need to do it this way in order to make things easier to understand:
<?php

namespace Tests\Feature;

use App\Imports\FinancialNoteImport;
use Illuminate\Http\UploadedFile;
use Tests\TestCase;
use Illuminate\Foundation\Testing\LazilyRefreshDatabase;

return new class extends TestCase
{
    use LazilyRefreshDatabase;

    public function test_that_excel_details_are_saved()
    {
        // We will remove this. Don't worry about it.
        $this->markTestIncomplete();
    }
};
At this stage, we still haven't written any actual testing code. However, we just added two new imports:
The
FinancialNoteImportwill point to anImportclass that will handle the processing of the document. Read about Imports here.The framework's
UploadedFileimport helps us to fake files while testing. We will populate this with the content of our actual file.
We have also marked the test as incomplete so that it will not be run when we run all other tests.
Using UploadedFile
Let's talk a bit more about why we need to use the Illuminate\Http\UploadedFile class and its limitations.
Basically, the whole point of this test - or what we aim to achieve - is to upload a file as though we were a user and then test that the exact content of the file is what is being saved in the database.
Sounds easy, but the question is how do we do this?
If we navigate to the Laravel documentation section on Testing File Uploads, we see a lot of examples about faking an UploadedFile instance. In those examples, we also see that we are encouraged to fake the Storage Facade as well with Storage::fake(). What this means is that we can pretend to create a file of any extension and then proceed to perform a bunch of assertions - like testing that the file has been uploaded and exists in storage, etc., etc., etc.
But the documentation really doesn't help if we need to make use of the contents of the file. What we want is a way to use an existing file. If you try to just get a real file from your storage disk and use it anyway, the test class will never be able to access the file.
I once did this in a project and had to scrap it, because I couldn't figure out why it never worked. The Assets directory contained three files. I split up a file in 3 parts and named them chunk1, chunk2, and chunk3. Here, I was trying to iterate through the Assets directory and upload each chunk to an endpoint that was responsible for taking these chunks one by one and merging them afterward:
$chunks = ['chunk1', 'chunk2', 'chunk3'];

// Loop sending of three chunks in the Assets/ directory
for ($i = 0; $i < 3; $i++) {
    $chunk = file_get_contents(base_path('tests/Assets').'/'.$chunks[$i]);

    $this->actingAs($this->user)
        ->patchJson(route('api.media.upload-chunk'));
}
That was a long time ago and I never needed to do it again... until recently.
This time, however, I decided to take the bull by the horns and dig deep into the Laravel source code for answers.
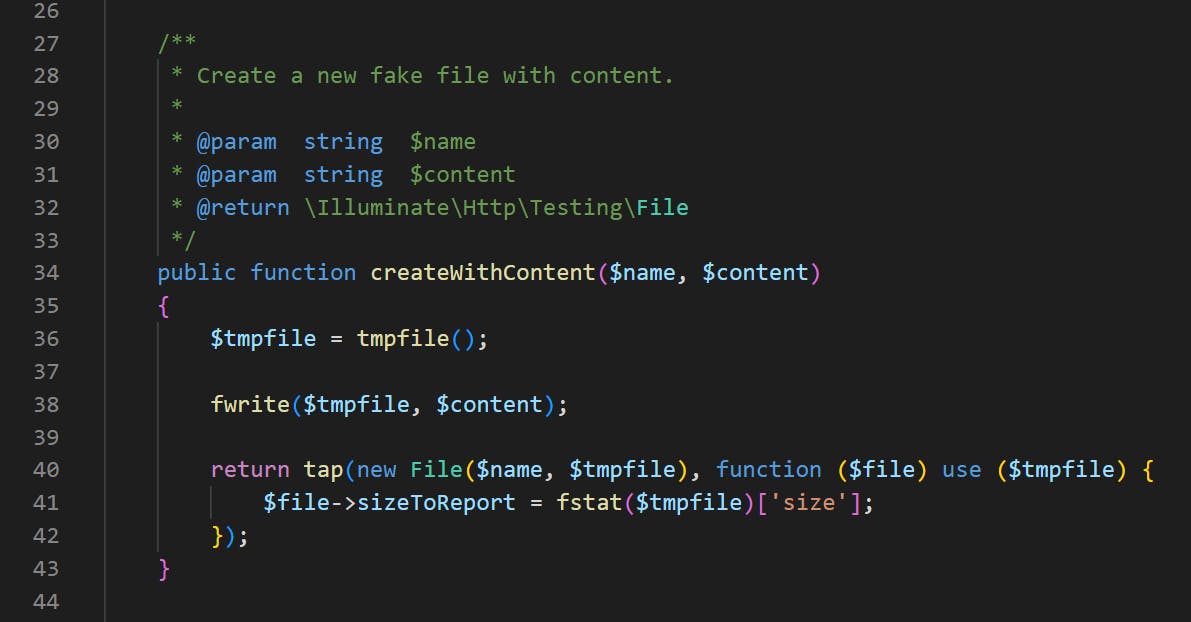
Fortunately, I found something. This is from the Illuminate\Http\Testing\FileFactory class:

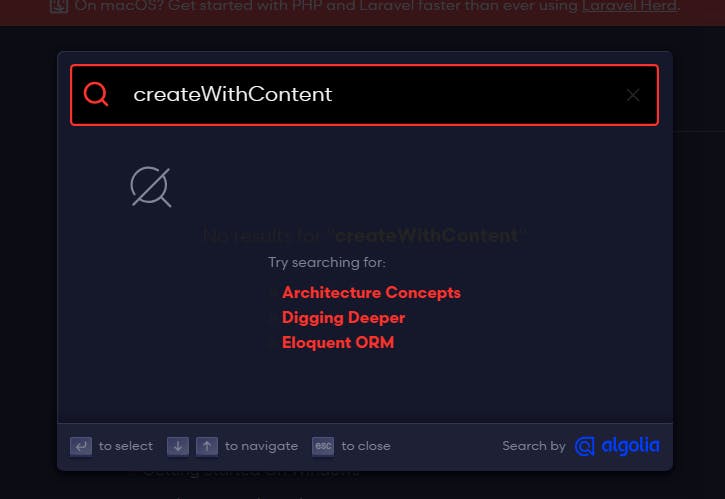
Observe that the createWithContent() method appears nowhere in the official documentation:

Finding it in the source code was a big relief. This made everything easy for me.
As a rule of thumb, I recommend digging through source code as a last resort if you need to do something that hasn't been documented yet. Sometimes, creators of frameworks write a lot of methods without documenting them. So dig first, and if you don't find anything, come up with your own solution.
Who knows? You might even be able to contribute your solution to the original repo!
Anyway, finding this method was significant as it meant I only needed to use it in my test and I'd be good to go. Therefore. I only had to modify my test class.
Since Laravel tests only recognize fake uploaded files, this is the way to go if you really need to use your own data within the files:
public function test_that_excel_is_processed()
{
    $fileContent = file_get_contents(base_path('tests/Assets/My Spreadsheet.xlsx'));

    // We can either use the same name or another. Doesn't matter.
    // I chose to use "sample"
    $file = UploadedFile::fake()->createWithContent('sample.xlsx', $fileContent);

    // This will process and save the contents of the file.
    // we don't need to go into detail here.
    (new FinancialNoteImport)->import($file);

    $this->assertDatabaseCount('financials', 1);
    $this->assertDatabaseHas('financials', [
        'total_issued_shares' => 1000000,
        'dividends_paid' => 0,
        'weighted_average_cost_of_capital' => 0.18,
        'capital_expenditure' => 2,
        'depreciation' => 4,
        'accumulated_depreciation' => 6,
        'historical_cost_of_assets' => 9,
        'cash_flow_from_operations' => 590,
    ]);
}
In this example, we simply retrieve the content of our spreadsheet into memory. (Make sure the file is not too large)
Next, we create a faked UploadedFile instance which we pre-populate with the content of the spreadsheet.
Then we go ahead to run the import using our custom Import class.
Lastly, we run two assertions: the first to ensure that the database contains only one record; the latter to check the values. We use the same values here that we configured in the spreadsheet.
Now we can run the aforementioned command: php artisan test --filter test_that_excel_is_processed.
Conclusion
Our test passes with flying colours!🎉🎉🎉
If we'd like to be extra sure that this is working, we can add $this->assertDatabaseCount('financials', 0); at the beginning of the test function to ensure that the database table is truly empty before running the test.
In this article, we have explored how to upload real files into Laravel tests. We only needed to find the right method for the operation, manually store a predefined file, load the file during the test, and check the database to make sure the file's contents were truly captured.
Also note that aside from manually digging through the source code to find the right method, Laravel has its entire API documentation available online. It requires a bit of digging as well but may be preferable to using the source code.
If there are any questions, don't hesitate to type them out in the comment section.
